
Your cart is currently empty!

Take your ombré nails to the next level with creative designs and art. Learn how to combine gradients with glitter, stamps, and other techniques.

Beyond the Basics: Creative Ombré Nail Art
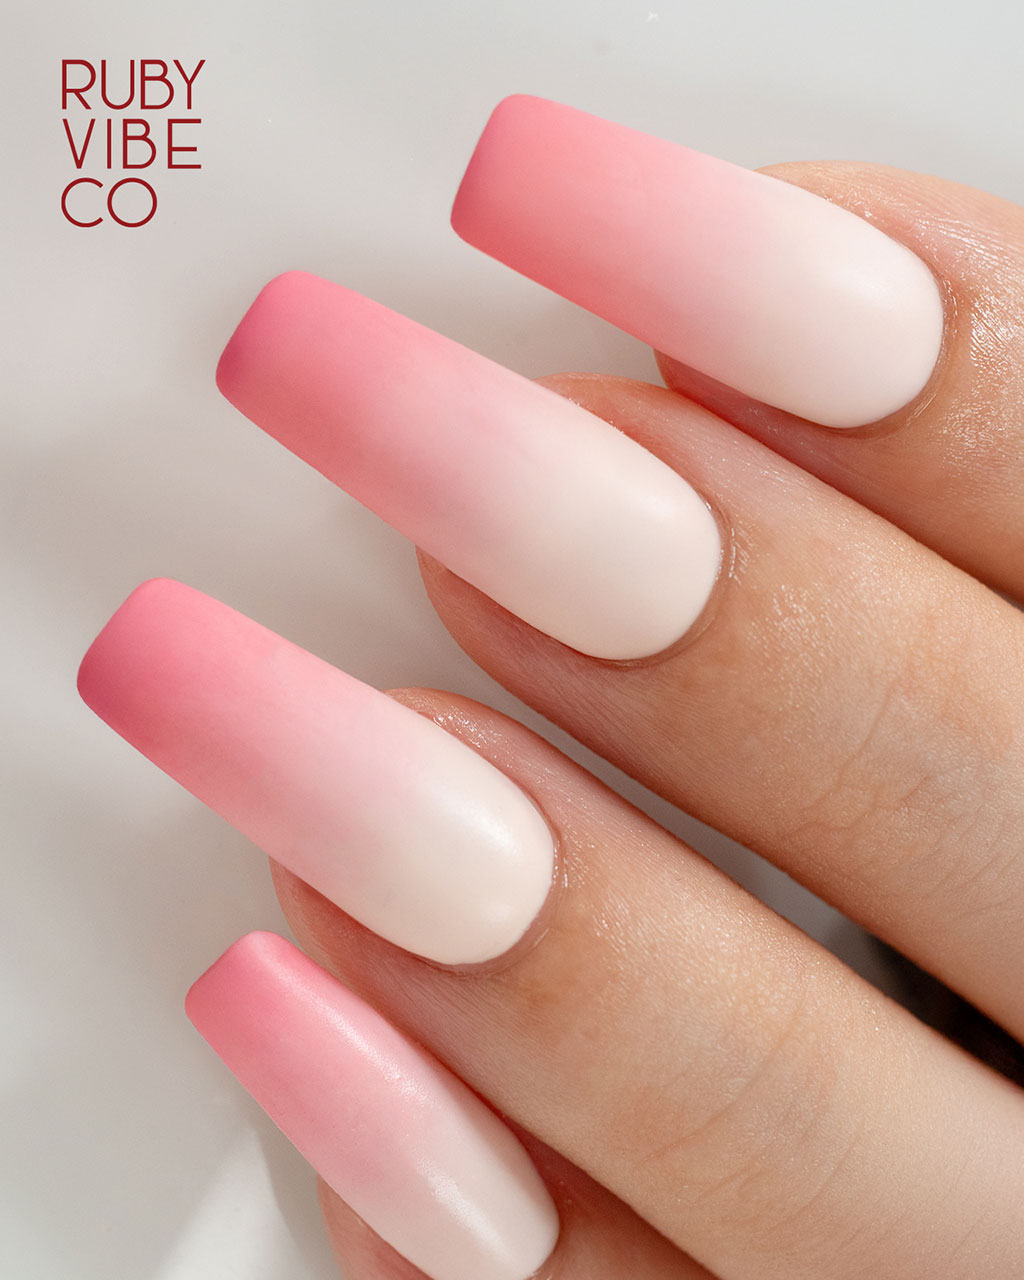
Ombré nails are beautiful on their own, but you can elevate them even further with creative nail art. Combining the seamless gradient with other techniques can result in a truly unique and personalized manicure. This blog will inspire you with innovative ideas to take your ombré nails to the next level. We will explore how to incorporate glitter, stamping, and different textures. Furthermore, we’ll give you some tips on how to combine these elements effectively. Consequently, you will be able to create a one-of-a-kind look that truly stands out.
First and foremost, let’s talk about adding glitter. One of the simplest ways to enhance your ombré is to add a glitter polish over the gradient. For example, you can create a beautiful ombré from pink to white and then apply a glitter top coat over the entire nail. In addition, you can use a glitter polish to create a reverse ombré. This involves applying glitter at the cuticle and then fading it out toward the tip.
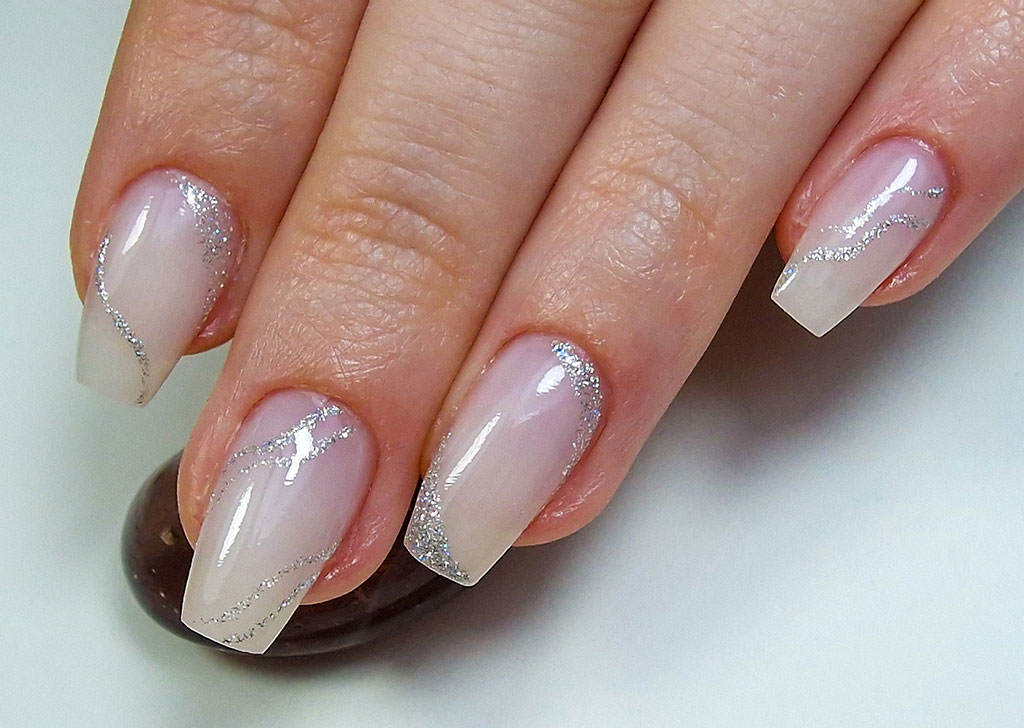
Most importantly, for a more subtle look, you can use a fine, iridescent glitter.
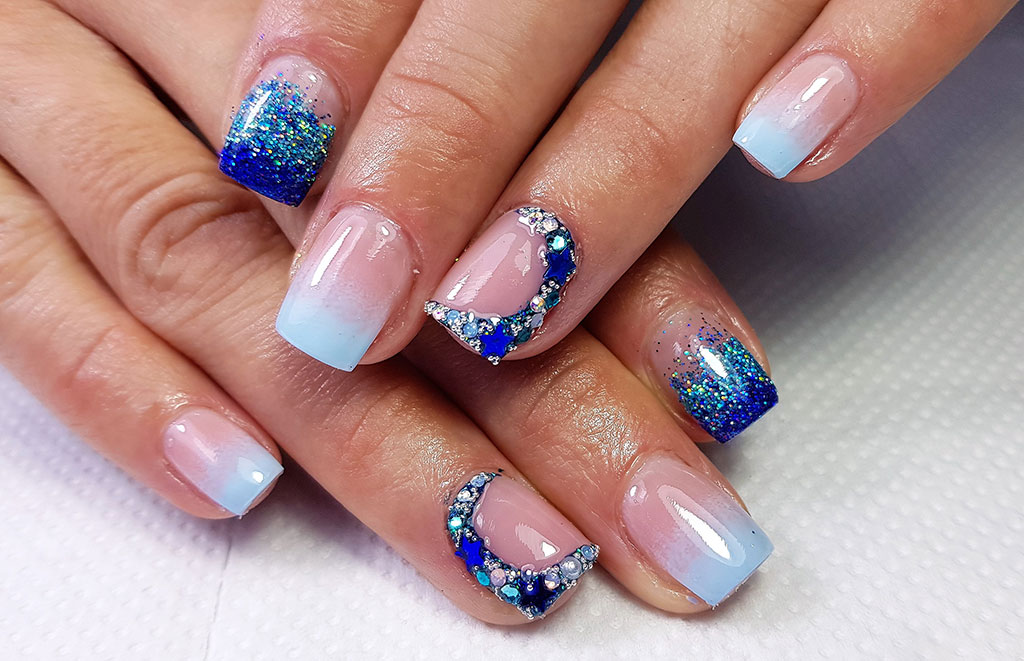
Conversely, for a bolder statement, use a chunky glitter polish. The combination of the smooth gradient with the sparkle of glitter is simply stunning.
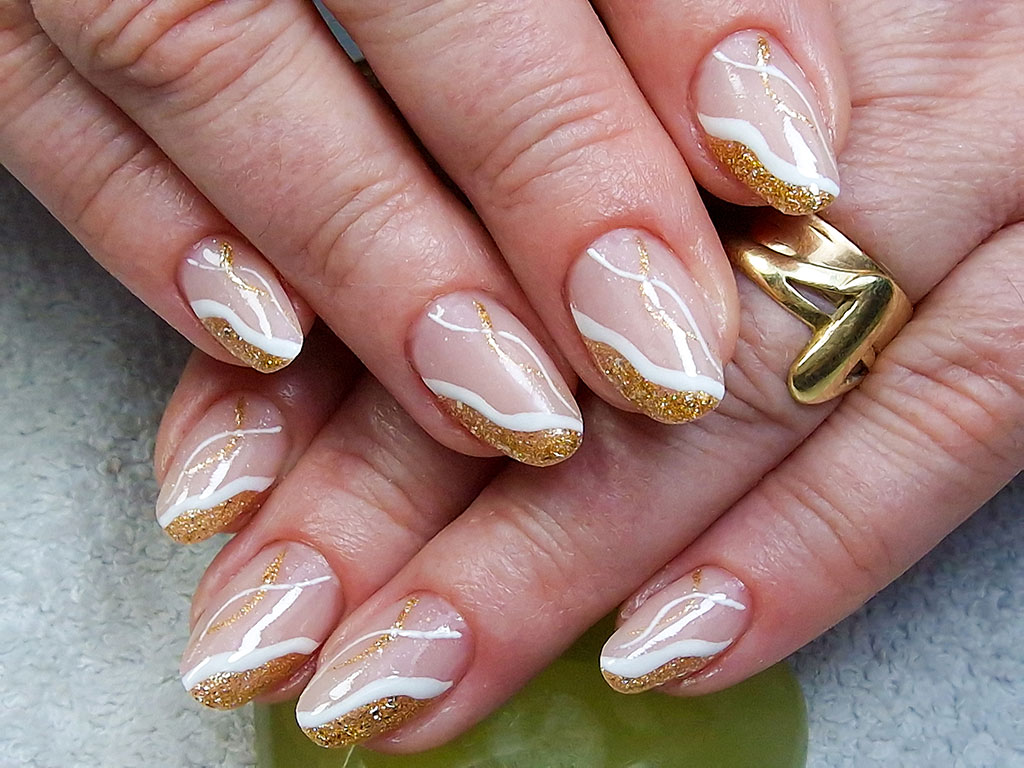
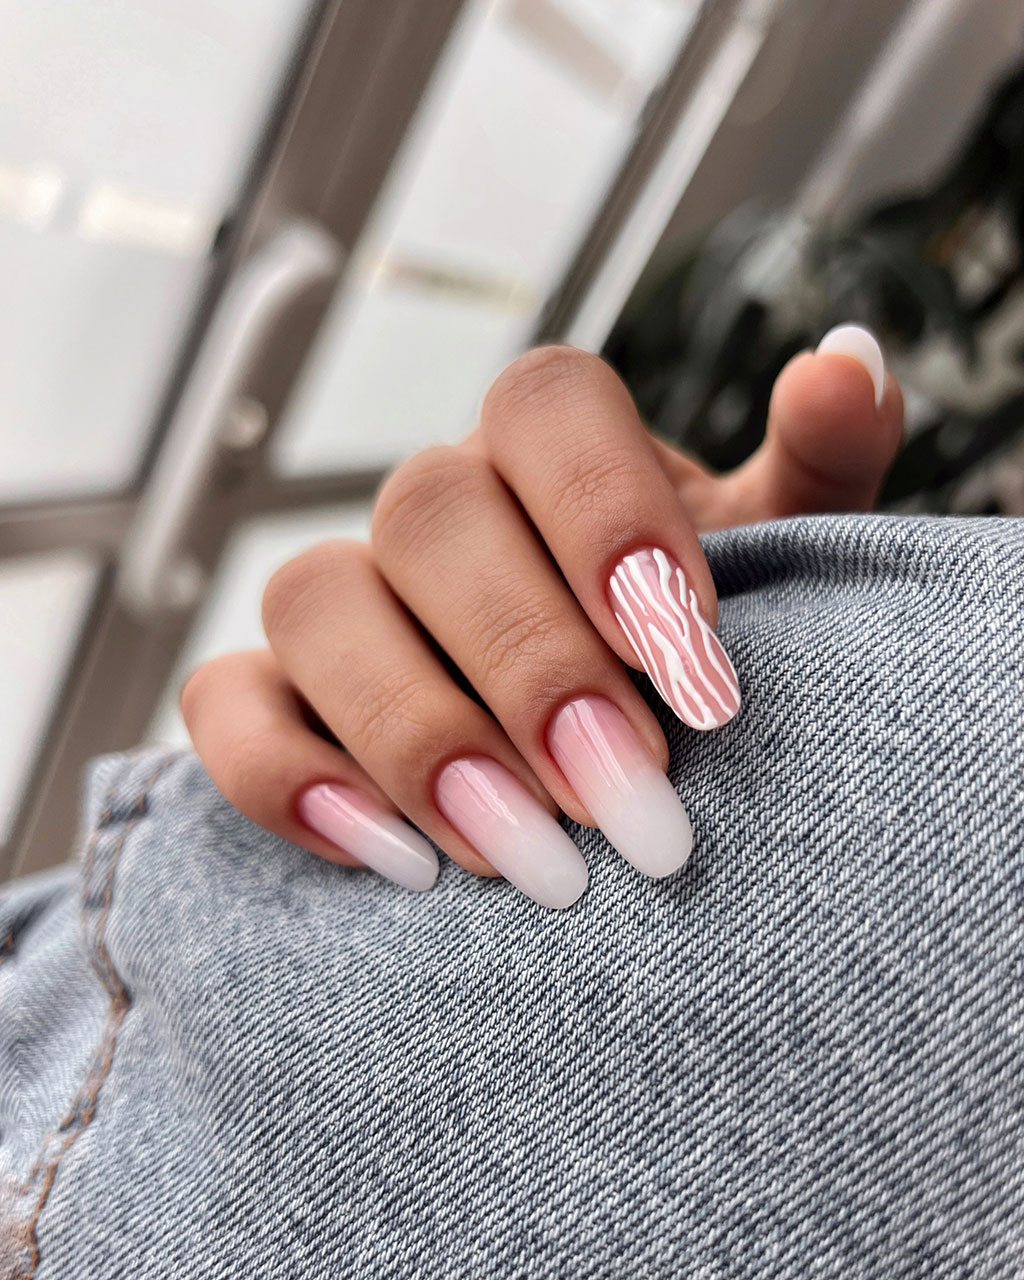
Furthermore, you can incorporate stamping into your ombré design. After creating your gradient, use a stamping plate with a design of your choice. You can stamp a delicate floral pattern or a bold geometric shape over the ombré. This adds an extra layer of detail and texture.
Additionally, you can create a unique look by using a stamping plate to create a pattern on the sponge before dabbing it on your nail. This will create a gradient and a pattern at the same time. The possibilities with stamping are endless.
Moreover, consider adding different textures. You can use a matte top coat over your ombré to create a velvety finish. This completely changes the look and feel of the manicure.
In addition, you can use a chrome or holographic powder over your gradient to create a reflective, multi-dimensional effect. This is a great way to combine two trends in one.
Finally, don’t be afraid to mix and match. For instance, you could have a matte ombré on some nails and a glitter ombré on others. By combining these techniques, you can create a truly artistic and personalized manicure that reflects your unique style.

Leave a Reply